Sign In / Sign Up
 Orders
 Product Keys
 Downloads

 Go to United States of America - English (USD)
Creating Bootable USB Media for Windows Server 2019 Installation
After downloading the Windows Server 2019 .iso file, you need to create a bootable USB drive to install the server.
Note: Ensure your USB drive has at least 16 GB of storage.
You can use the following application for this task:
Rufus
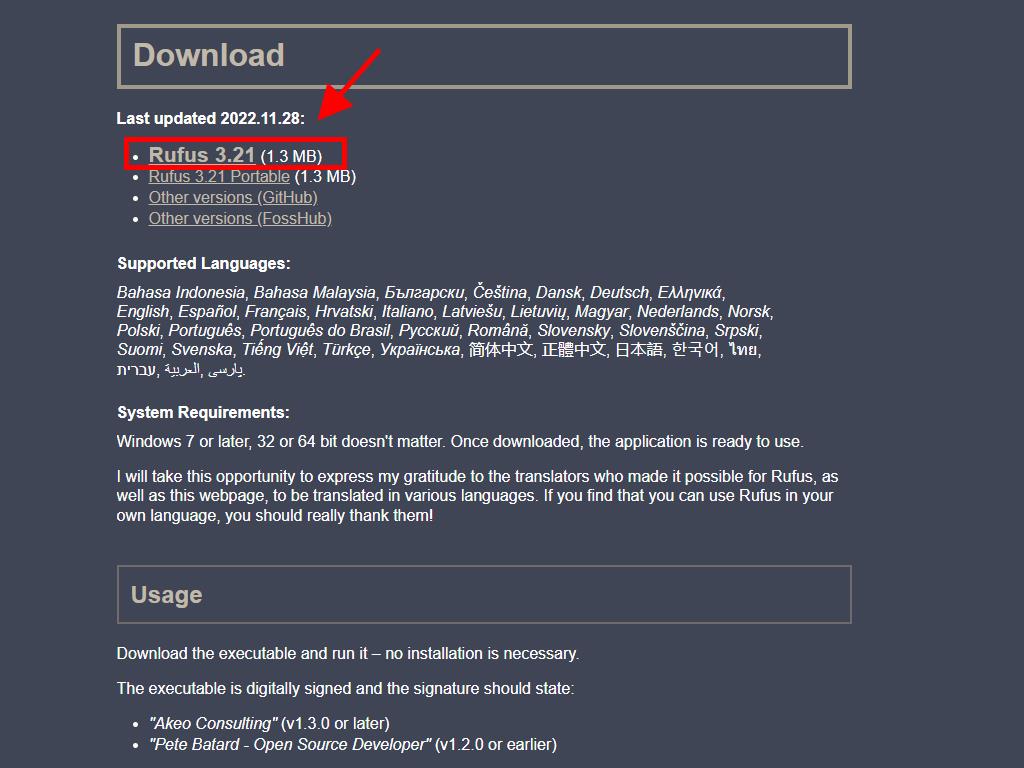
- Download it for free here.
- Scroll down and download the latest version of Rufus in the Download section.
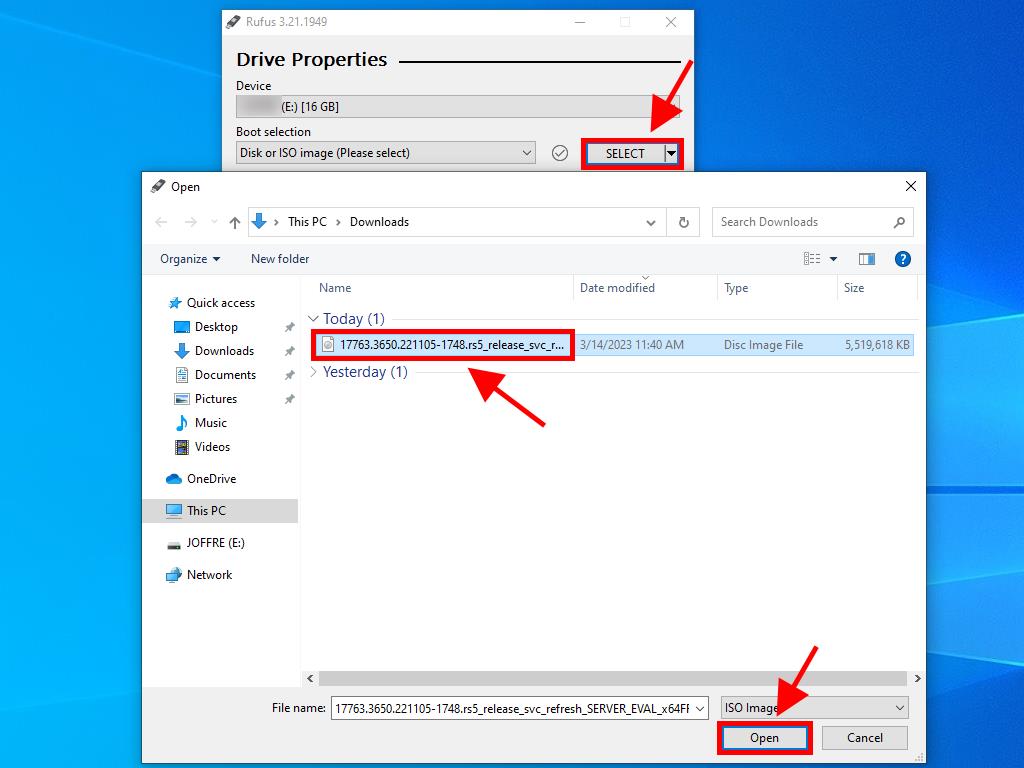
- Plug in your USB drive and open the Rufus application.
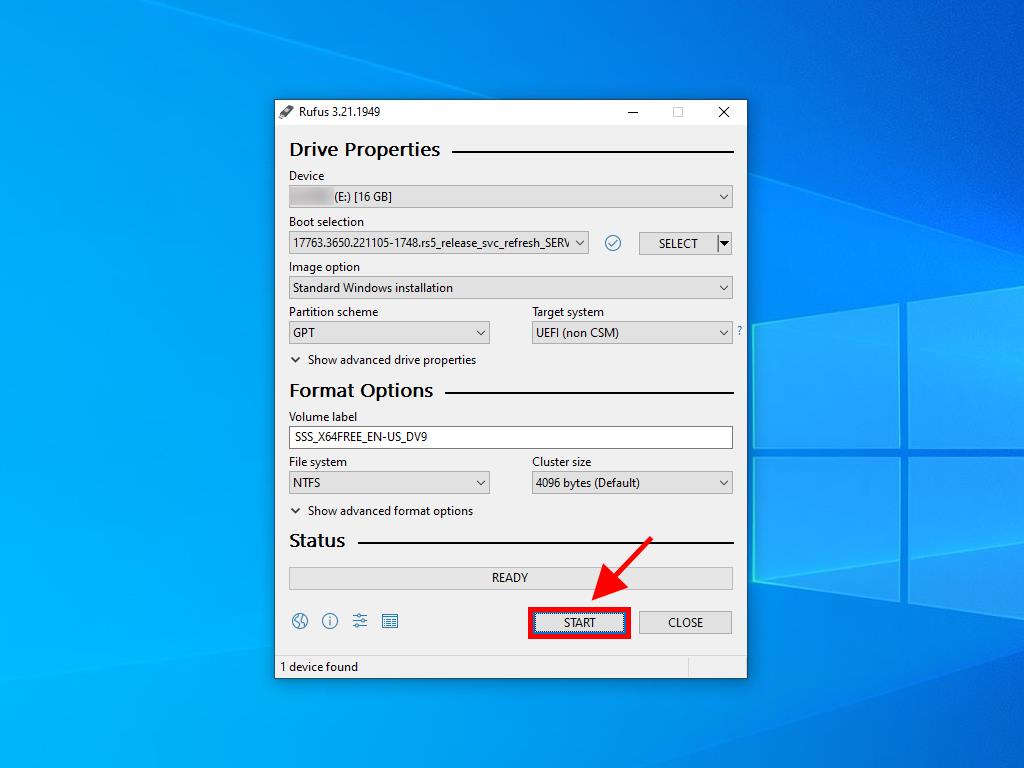
- Click Select and locate the Windows Server 2019 .iso file you downloaded.
- Finally, click Start and wait for the application to create the bootable USB drive.
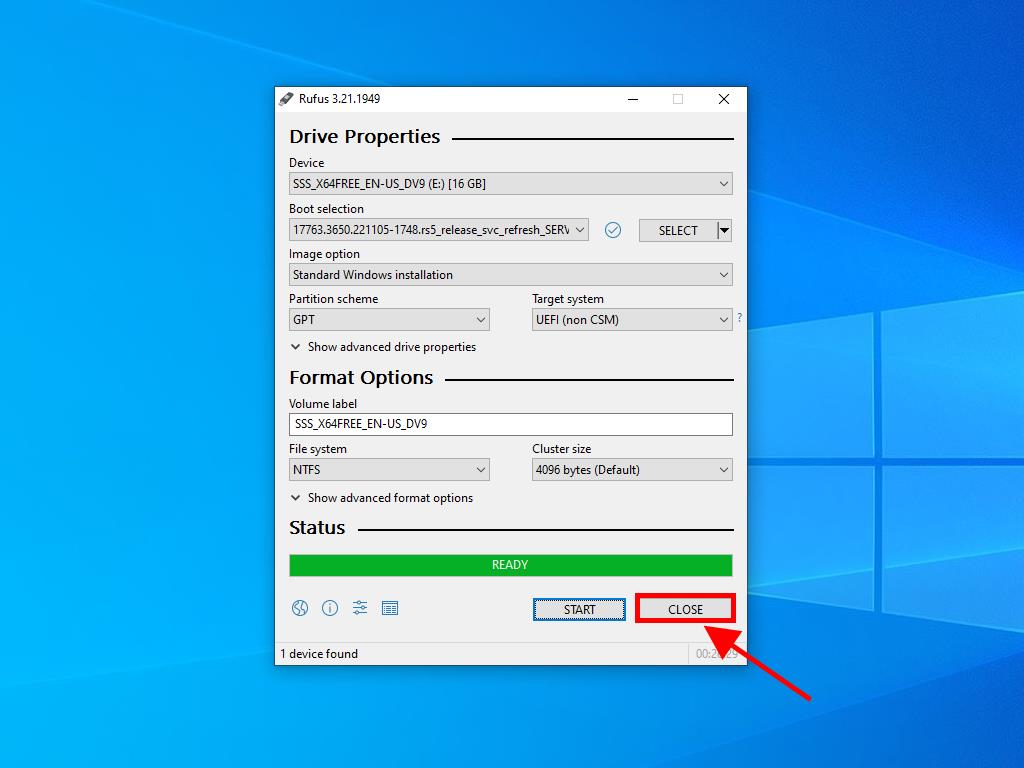
- Once the process is complete (progress bar shows Ready), click Close and you are ready to install Windows Server 2019.
Note: When the Customize Windows Installation window appears, select Disable Data Collection and wait for the process to complete.