 Sign In / Sign Up
 Orders
 Product Keys
 Downloads

 Go to United States of America - English (USD)
How to configure Windows Server 2016 on a VirtualBox VM?
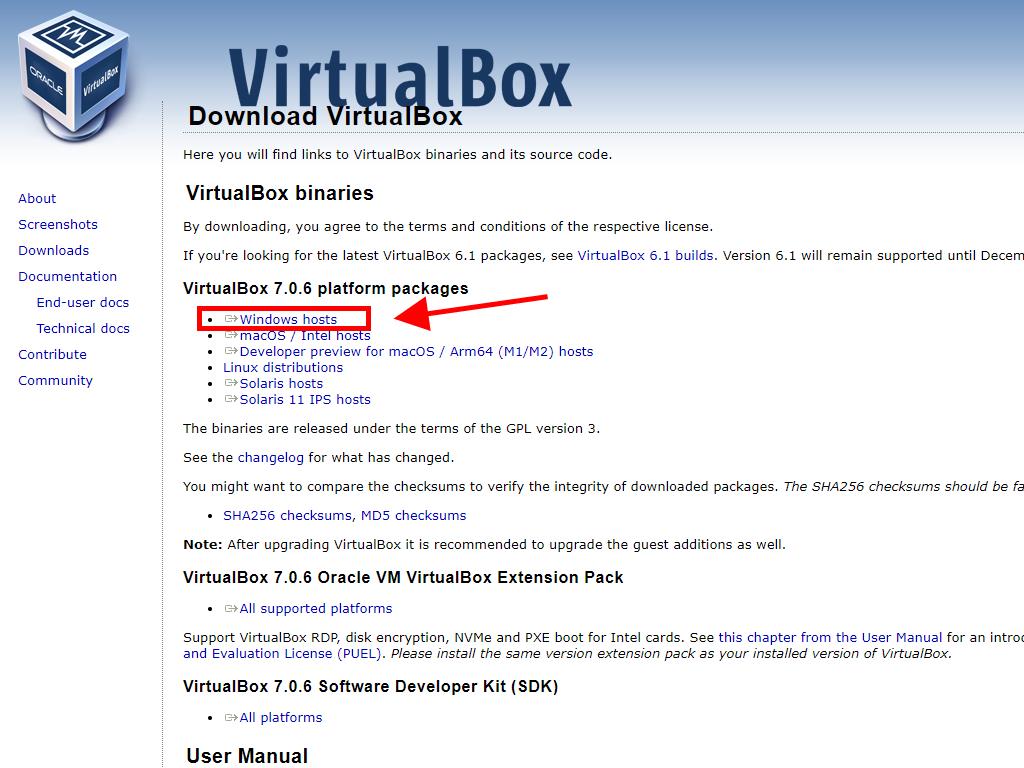
To get VirtualBox installed on your computer, follow these steps:
- Click here and choose the Windows Hosts option.
- The VirtualBox file will begin downloading on your computer.
- Open the downloaded file and proceed with the installation.
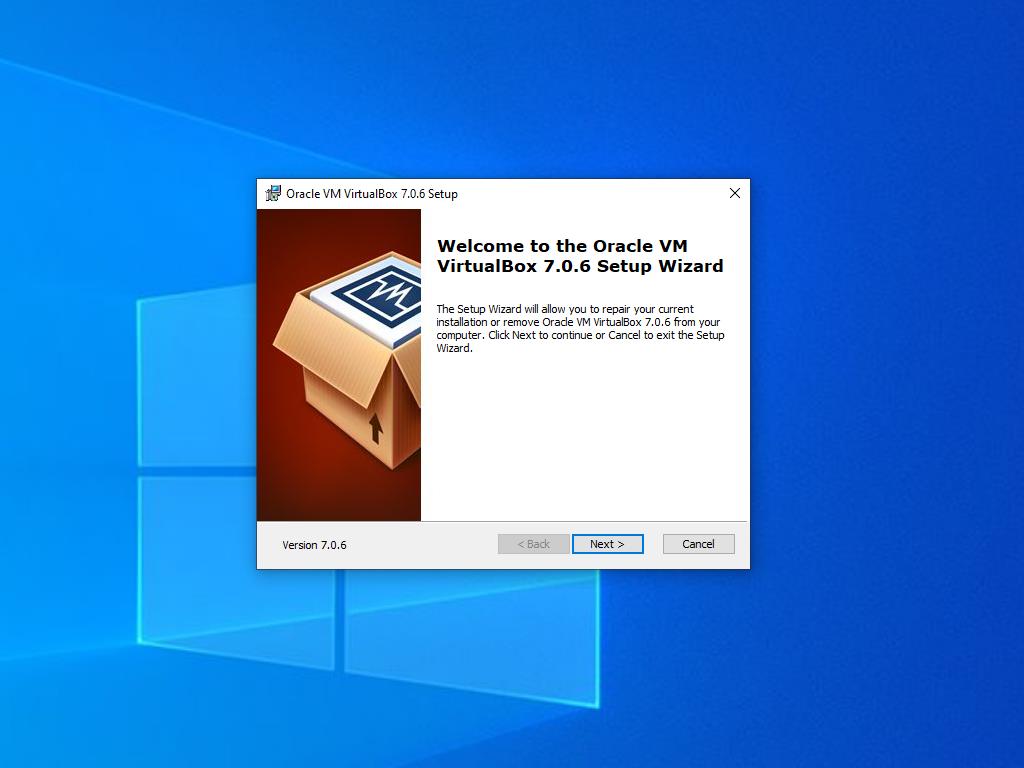
Note: If you encounter problems during installation, try deselecting the USB features in the setup wizard.
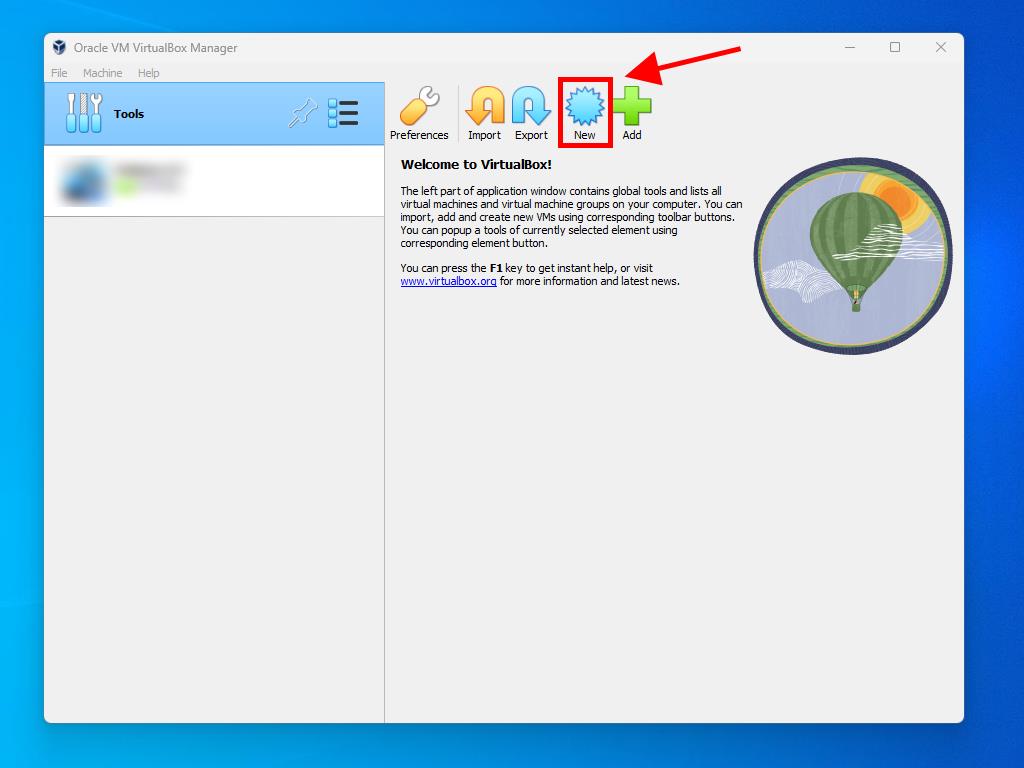
To create a new virtual machine in VirtualBox, follow these steps:
- In the Machine menu, click the New button.
- Name your Virtual Machine, select the location of the Windows Server .iso file, then click Next.
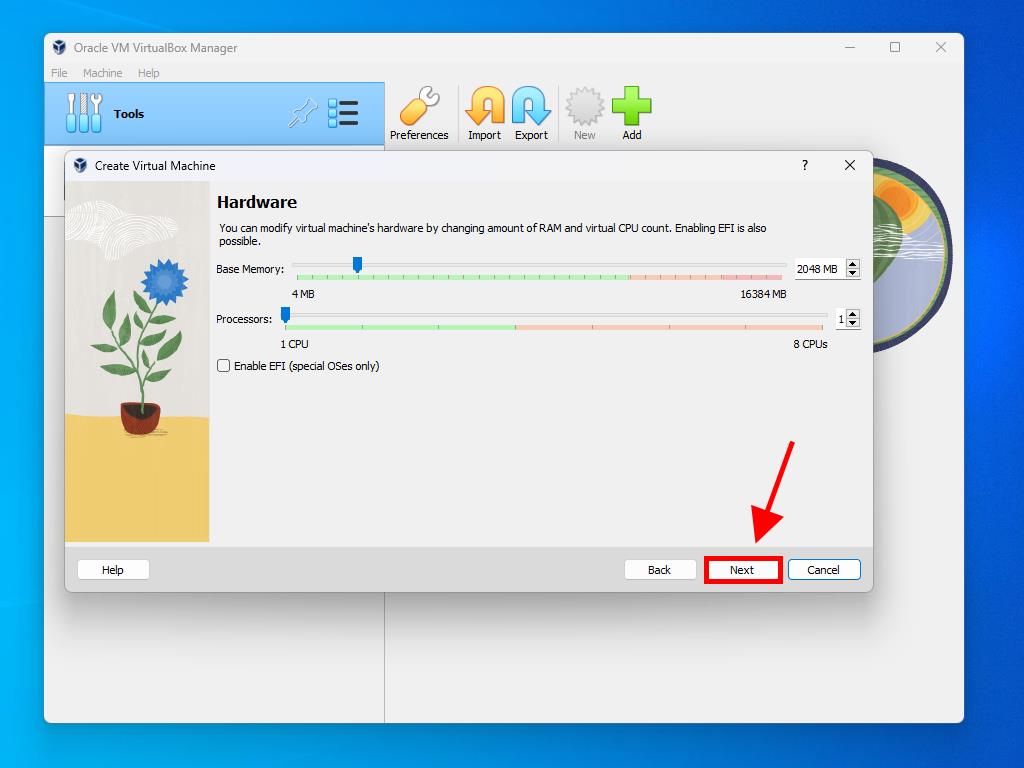
- Allocate at least 4 GB of RAM, then click Next.
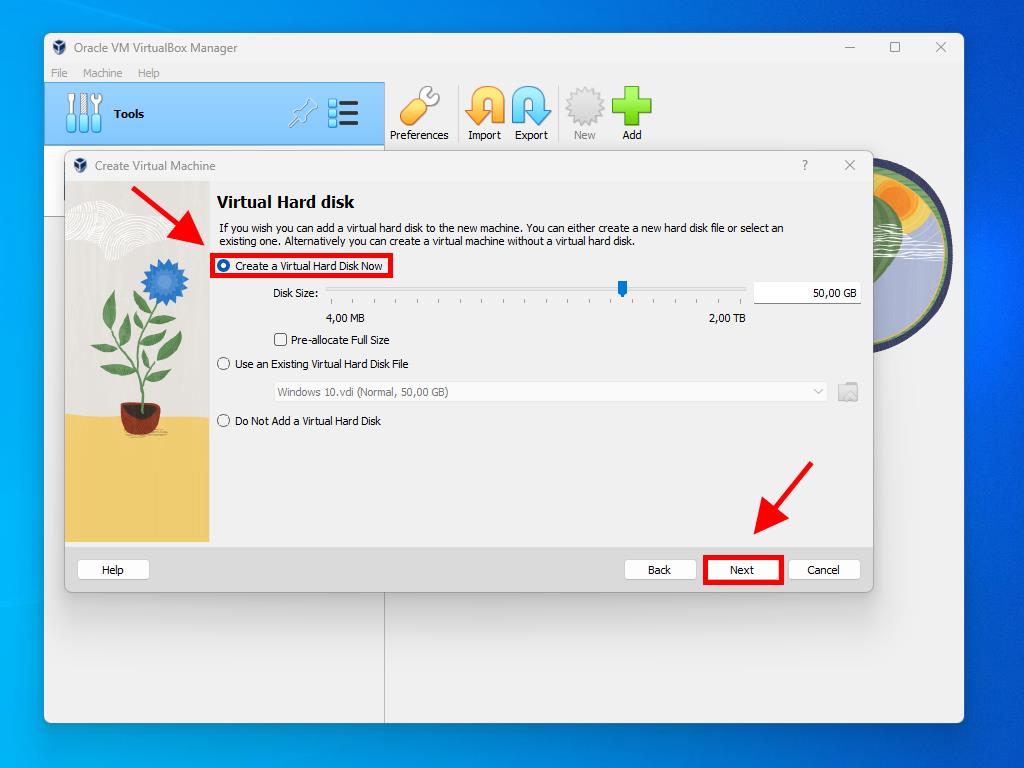
- Choose to create a virtual hard disk now, selecting at least 50 GB for optimal performance, then click Next.
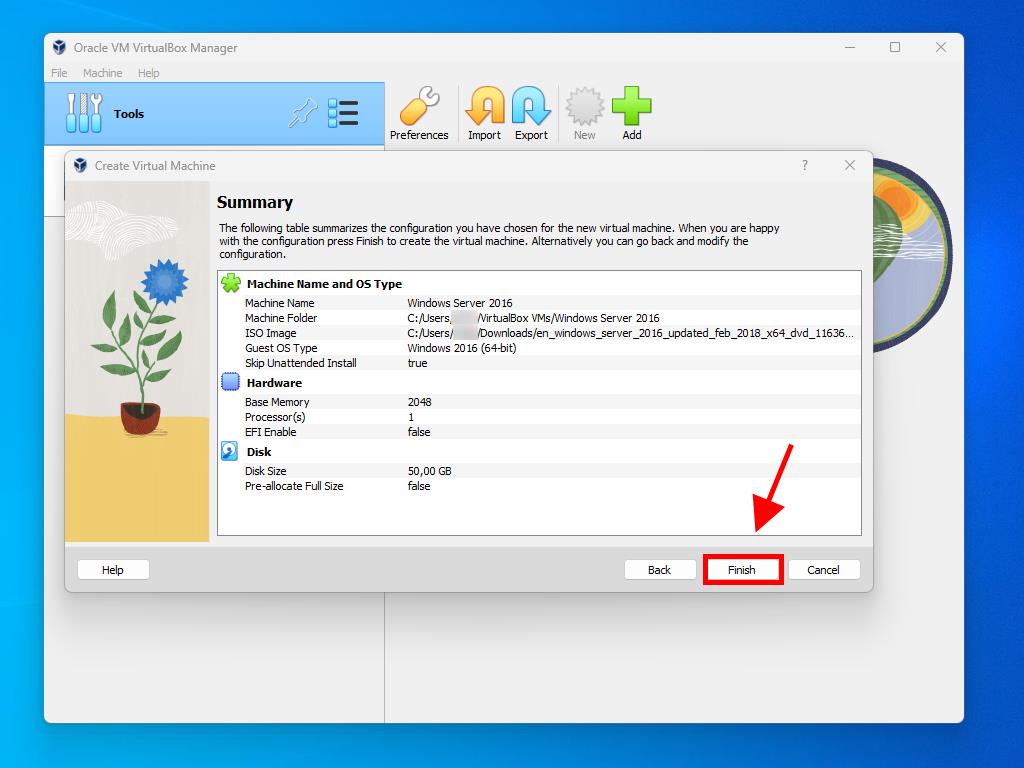
- In the Summary window, click Finish.
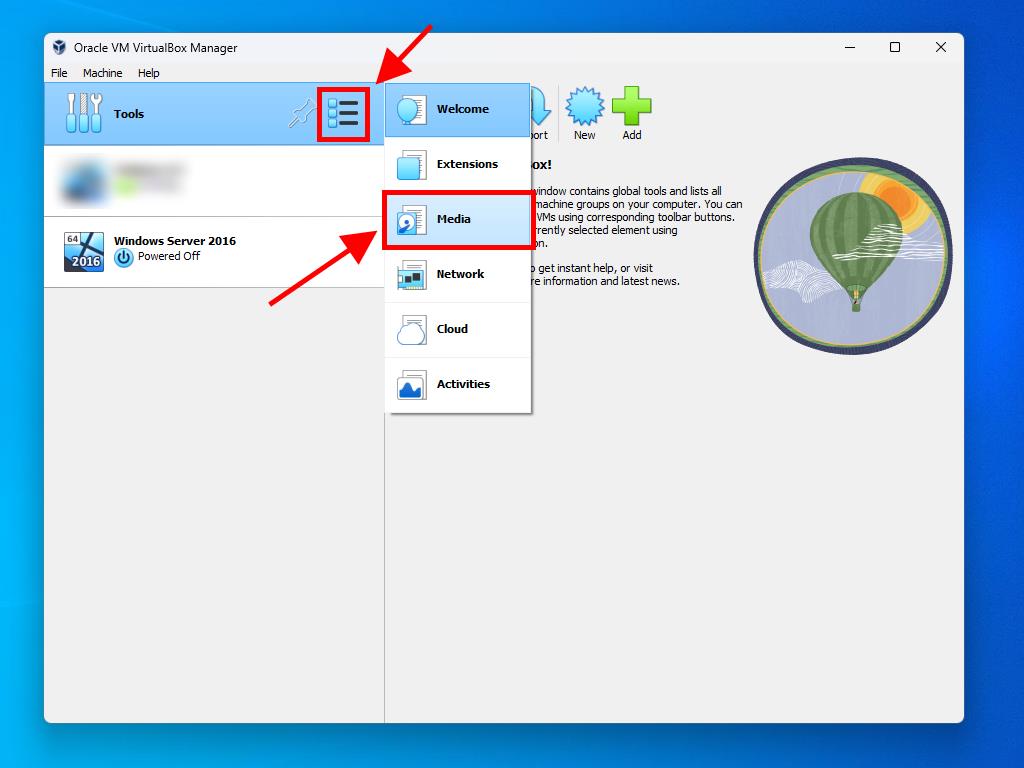
- In the Tools tab, locate the Windows Server .iso file by clicking the button with three dots. From the dropdown menu, select Media.
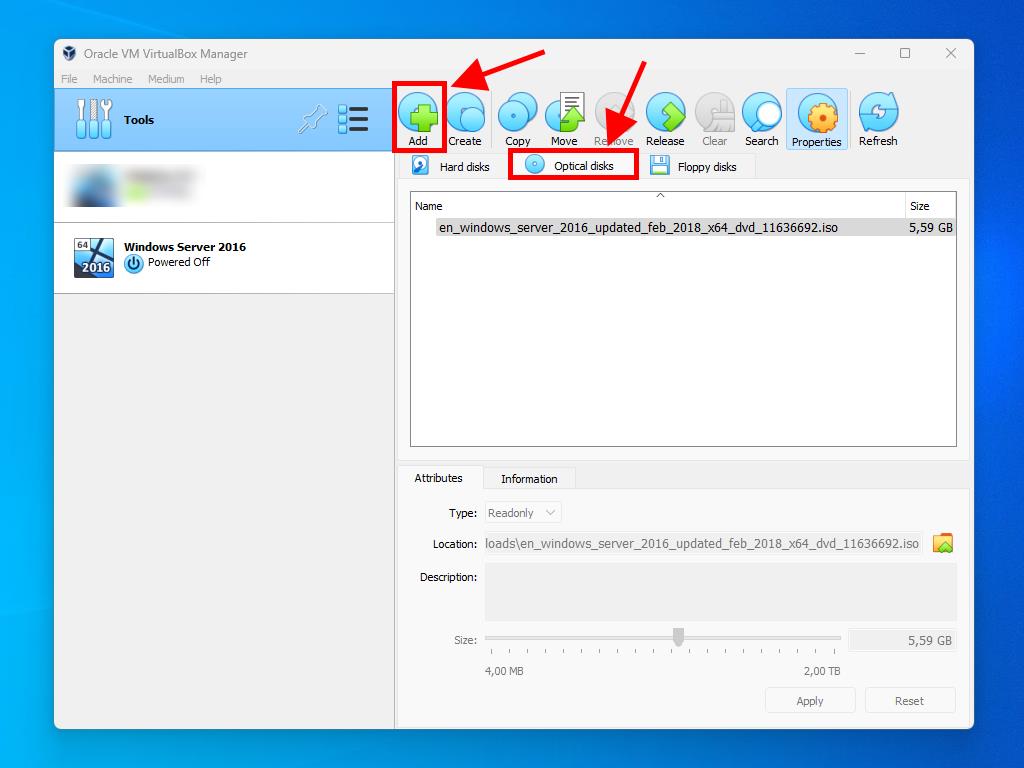
- Then, go to the Optical Disks tab and click Add.
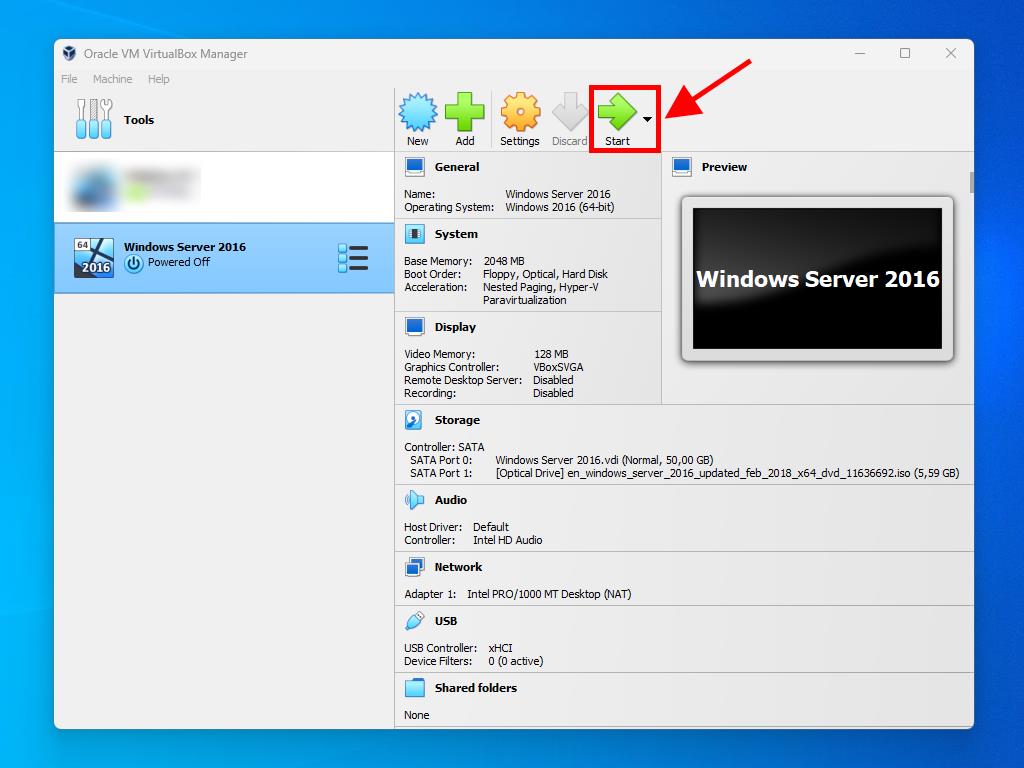
- Power on the virtual machine by clicking Start.
- The installation of Windows Server 2016 will start.
Note: Be sure to tick the box labelled Skip Unattended Installations.

Note: You can allocate more RAM if desired, provided it meets system requirements.
Note: For additional configuration information, refer to the section: How do I install Windows Server 2016?.