Sign In / Sign Up
 Orders
 Product Keys
 Downloads

 Go to United States of America - English (USD)
Activating Windows Server 2016: A Step-by-Step Guide
Go to the account section on our website. Hover over Profile (without clicking), and a dropdown menu will appear. Select Product Keys.

Here, you will find the product key needed to activate Windows Server 2016.
If you are activating an existing Windows Server, ensure it is not in the evaluation period and follow these steps:
Note: It is recommended to download and install all software updates before starting the activation process.
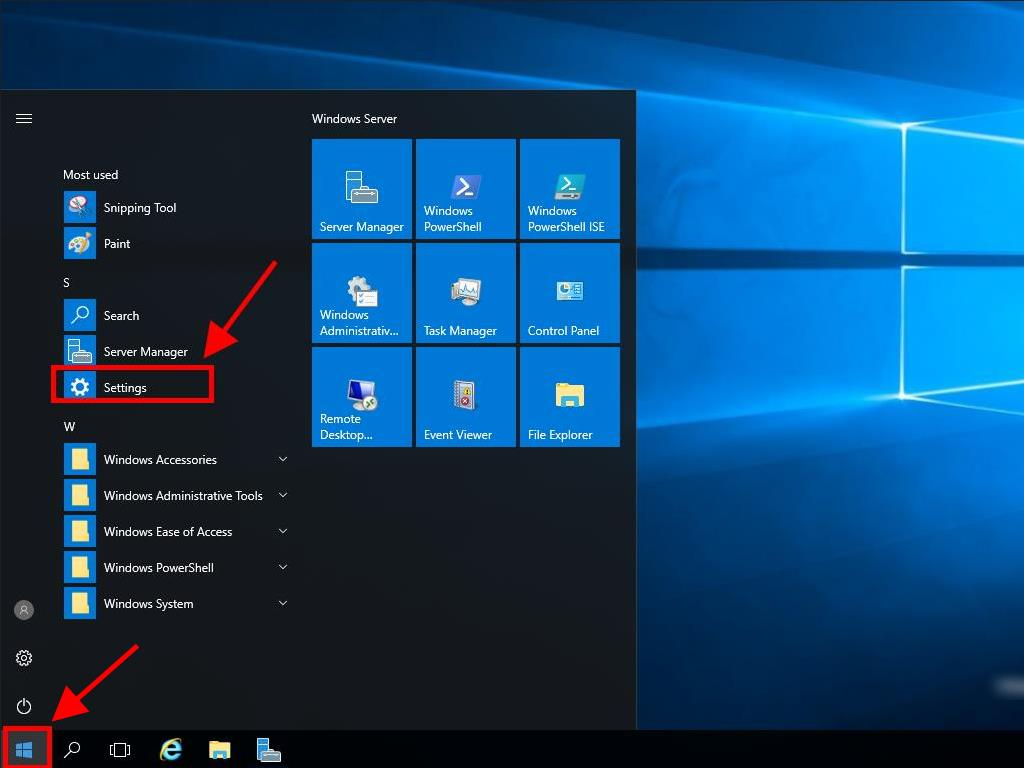
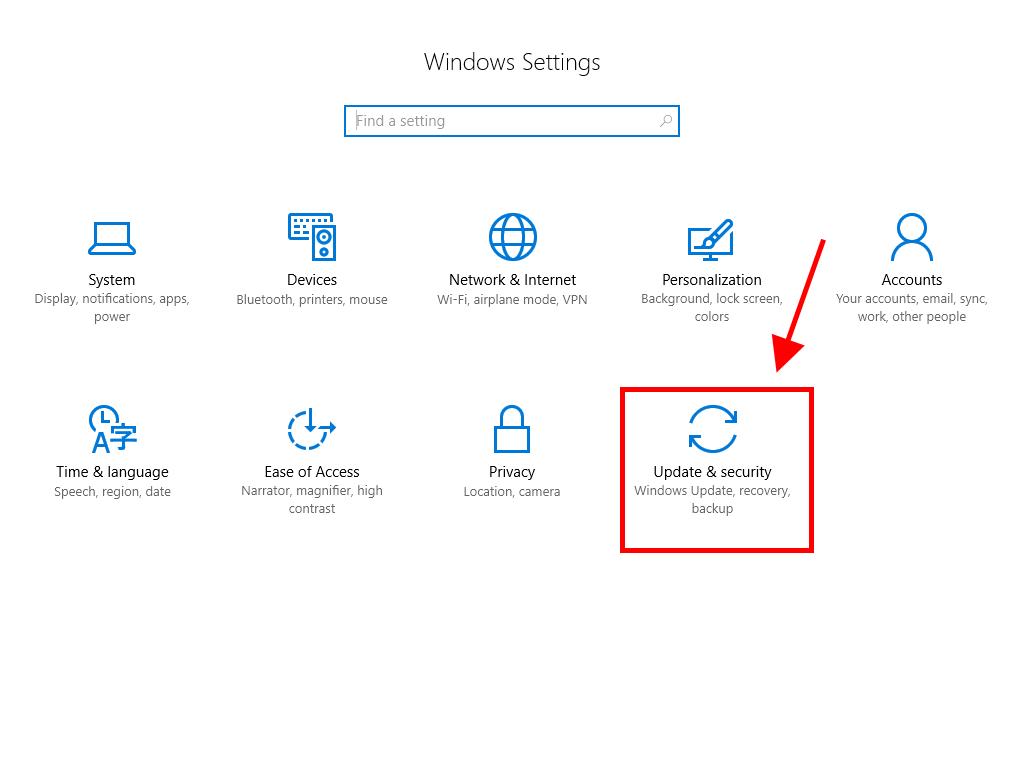
- After installing all available updates for Windows Server, click the Start button and go to Settings.
- Next, select Update & Security.
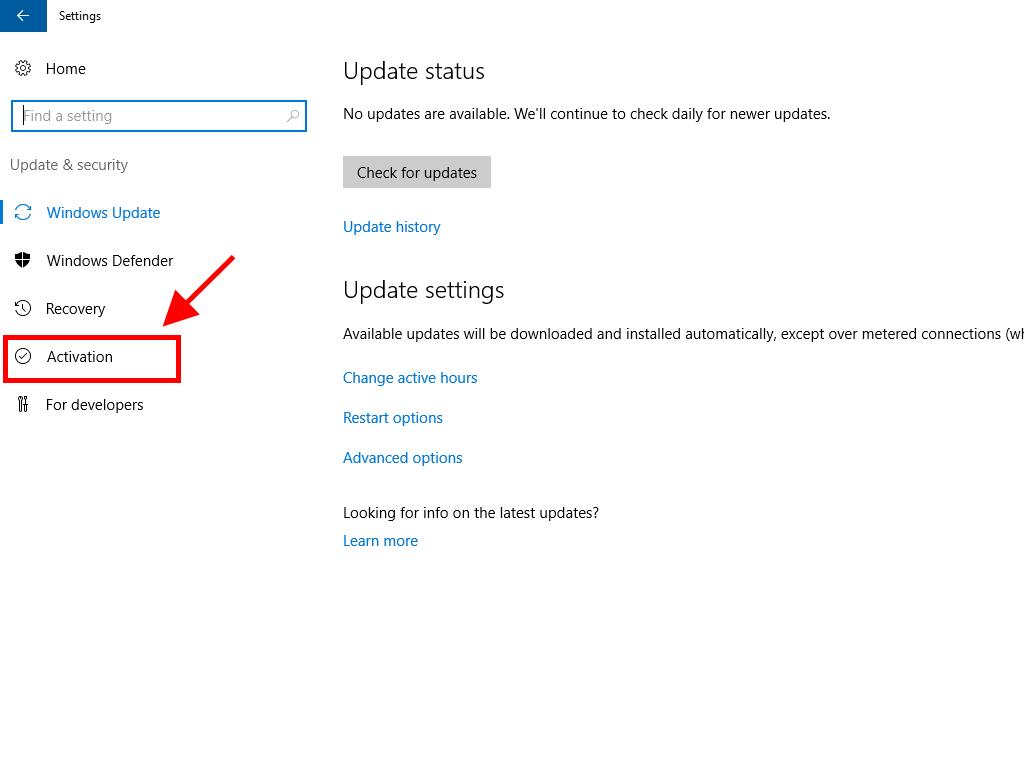
- Click Activation.
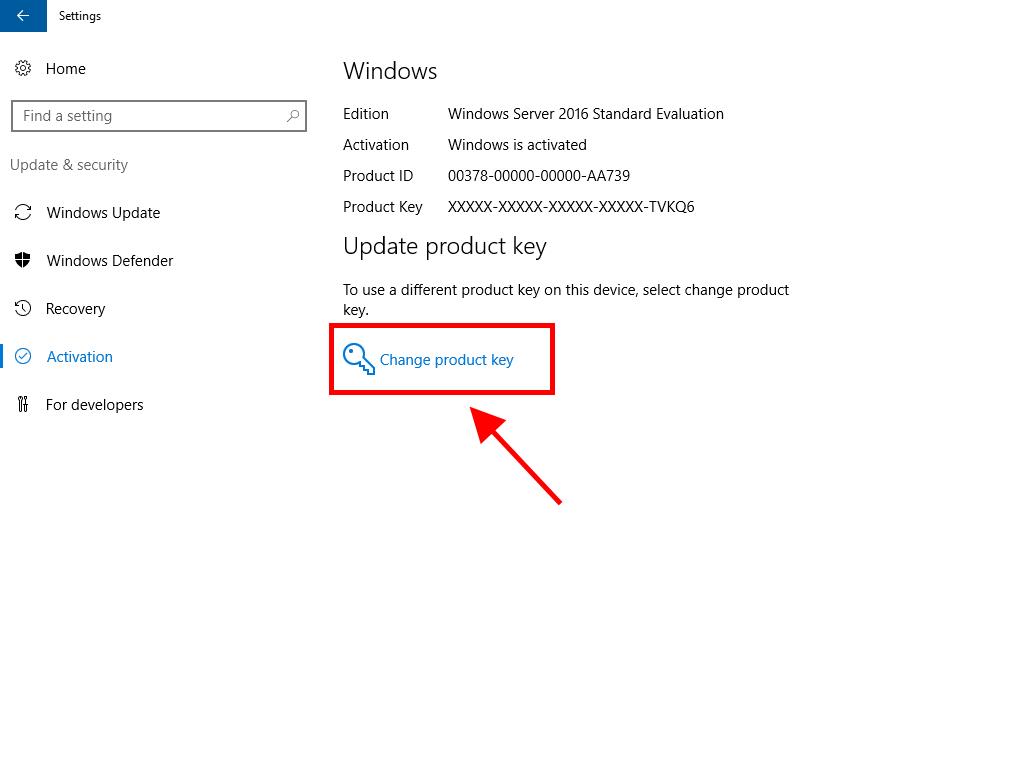
- Then, choose Change product key.
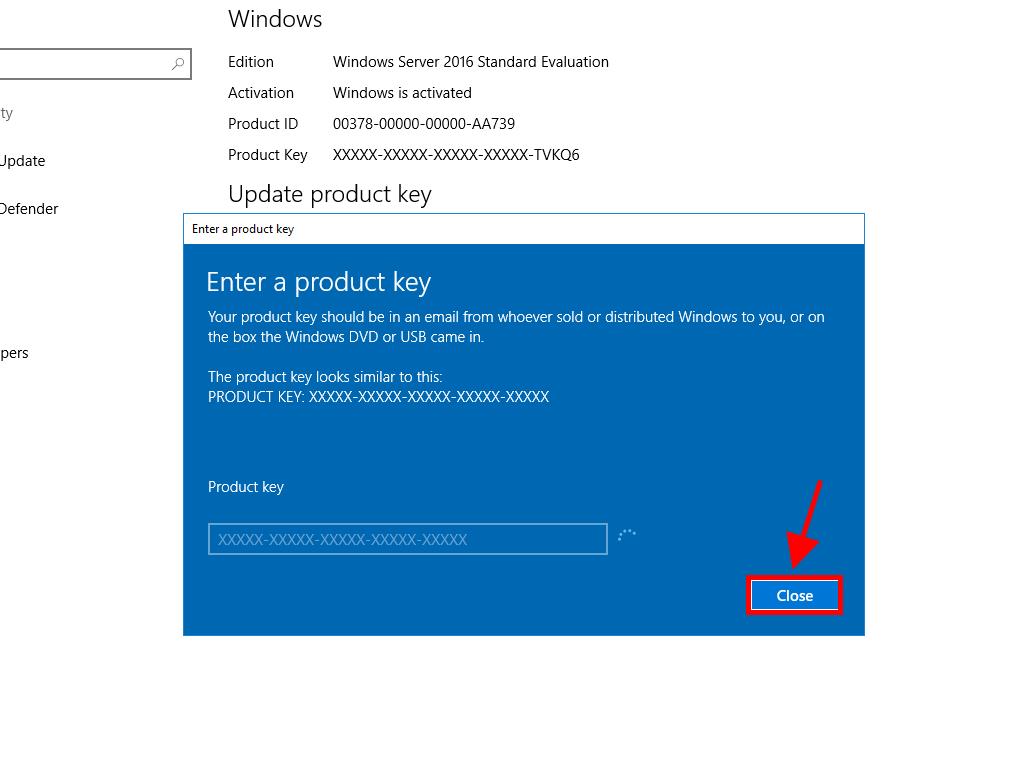
- Enter your product key. The license will be recognised and activated automatically. Then click Close.
Note: If after entering your product key you see the message The product key you entered didn't work. Check the product key and try again, or try a different one, your system may be an evaluation edition or installed on a different activation channel. Contact our support for help. For personalised assistance, click here.
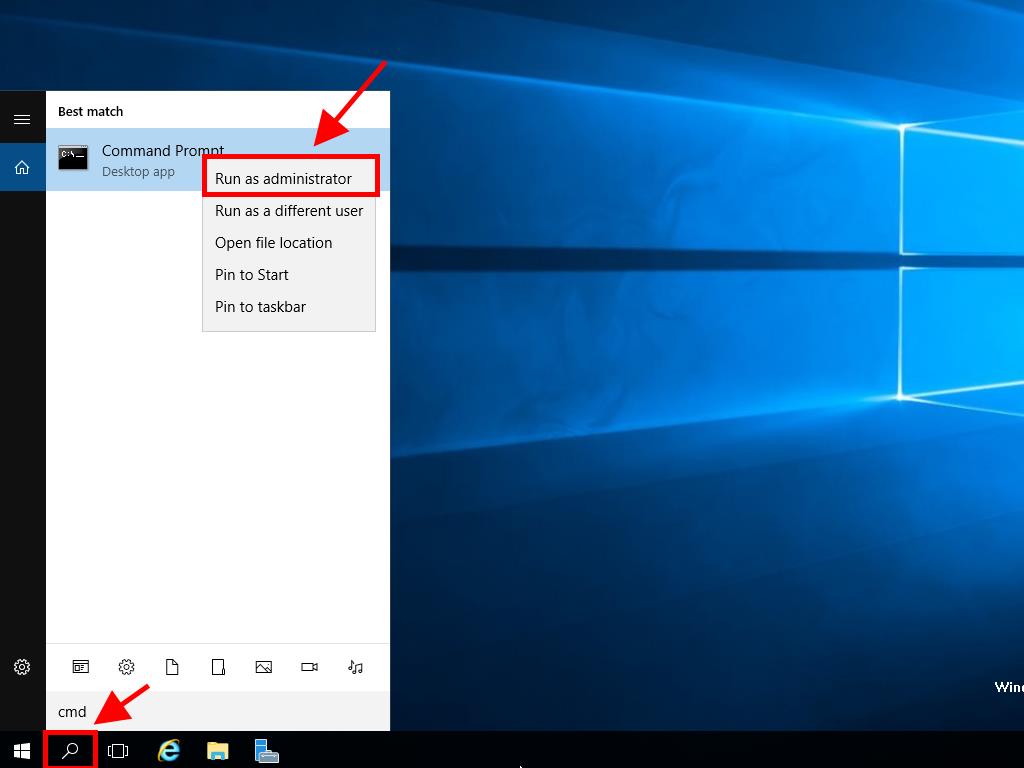
If your system is installed as an evaluation edition, follow these steps:
Note: Ensure the server has all updates installed to avoid errors during activation.
- In the taskbar search box, type CMD. Right-click Command Prompt and select Run as administrator.
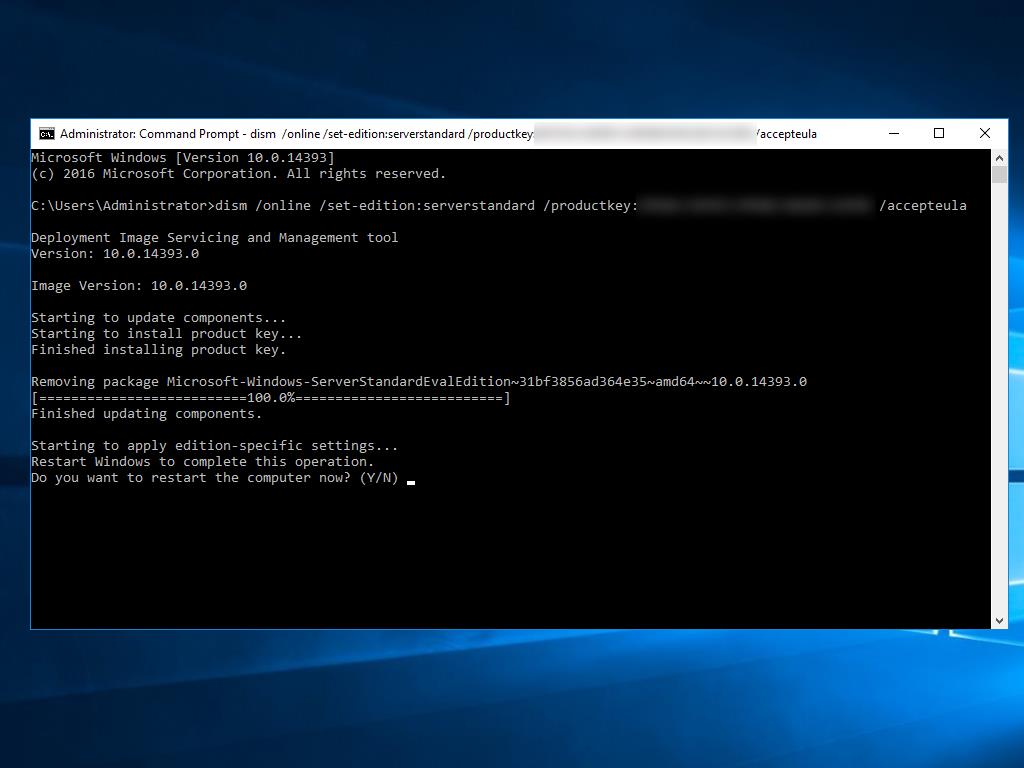
- Type the command: dism /online /set-edition:serverstandard /productkey:XXXXX-XXXXX-XXXXX-XXXXX-XXXXX /accepteula. Replace the Xs with your product key and press Enter.
- After the activation process completes, restart the server.
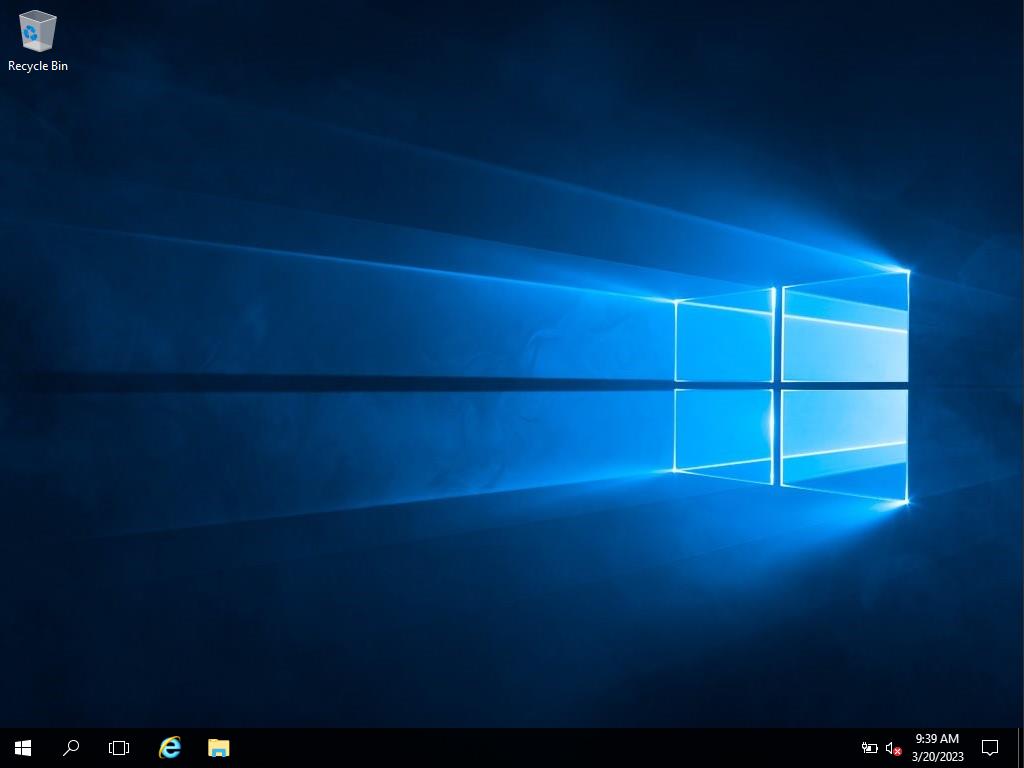
- Upon restarting, your Windows Server 2016 will be activated. The Windows Server Standard Evaluation watermark will no longer be visible.