Sign In / Sign Up
 Orders
 Product Keys
 Downloads

 Go to United States of America - English (USD)
How to Change the Display Language in Windows Server 2012 R2
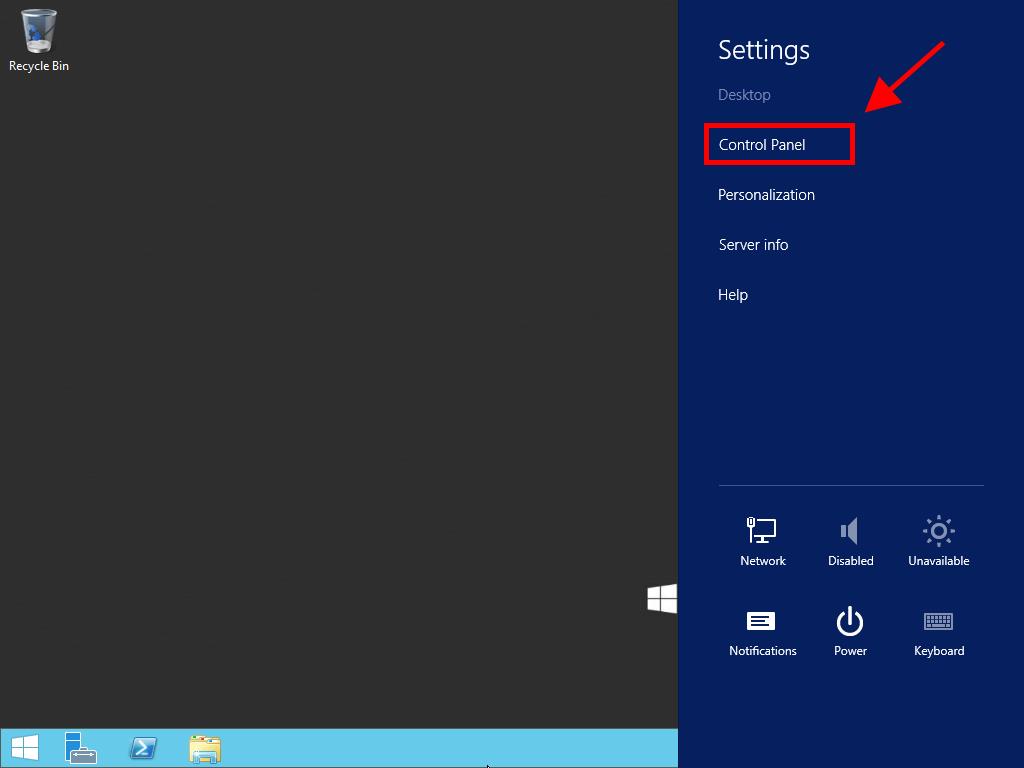
- Click the Start button and then select Control Panel.
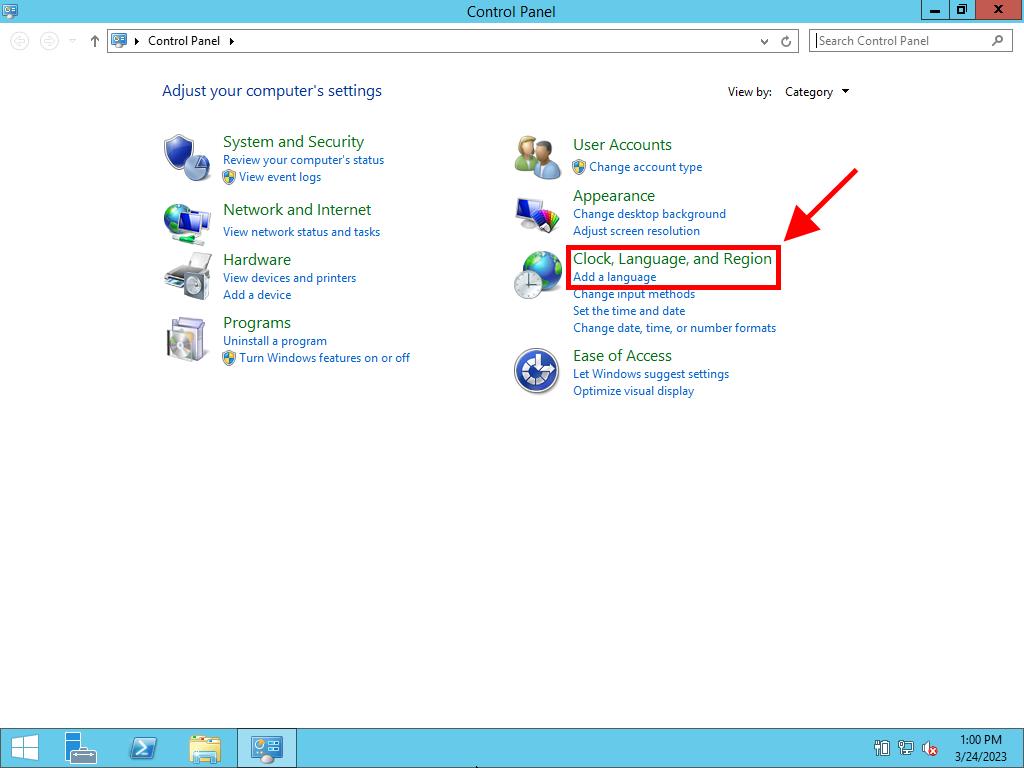
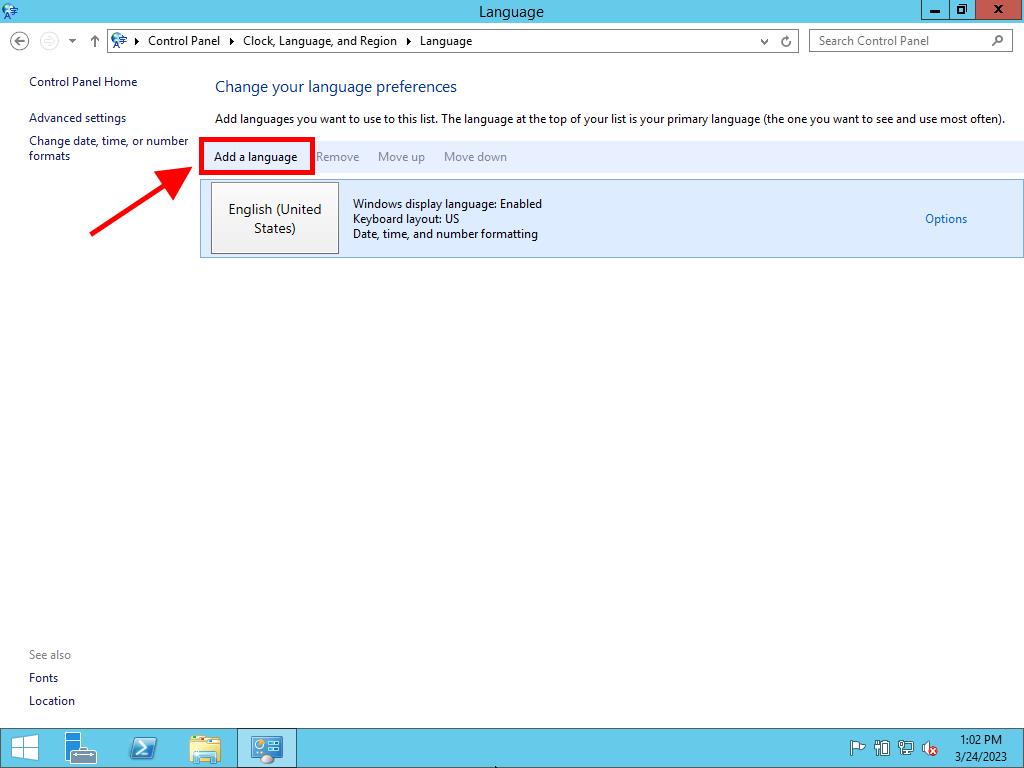
- Next, under Clock, Language, and Region, click on Add a Language.
- Then, click on Add a language again.
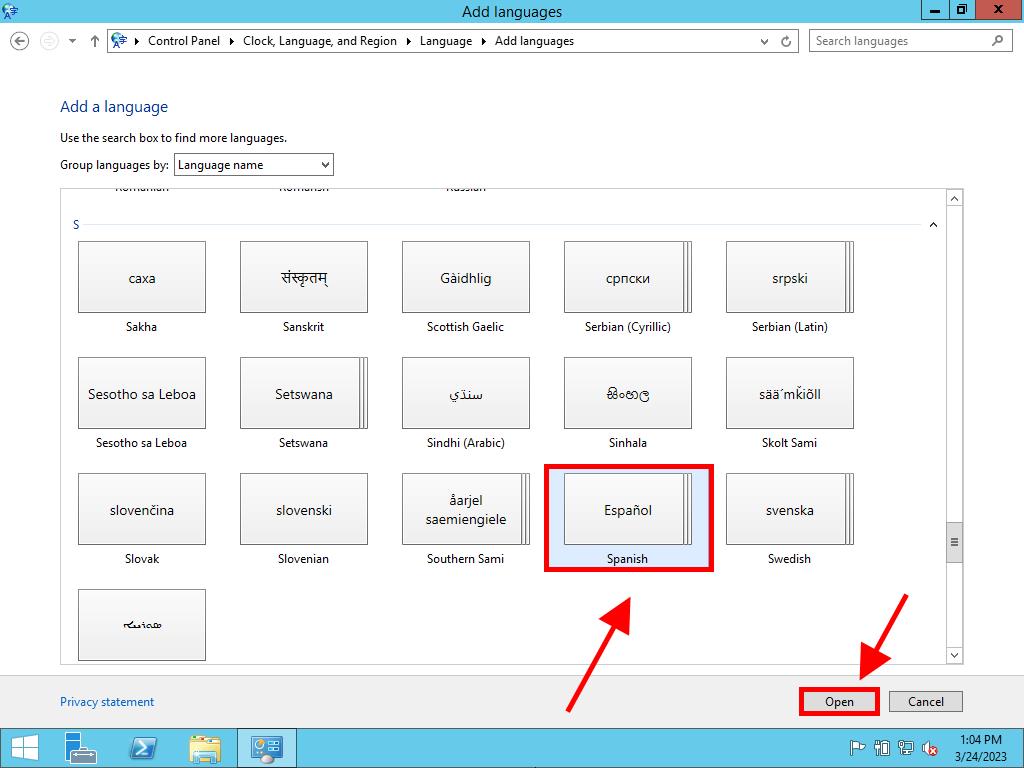
- Scroll to find the language you need.
- Select the language you want to install and click on Open.
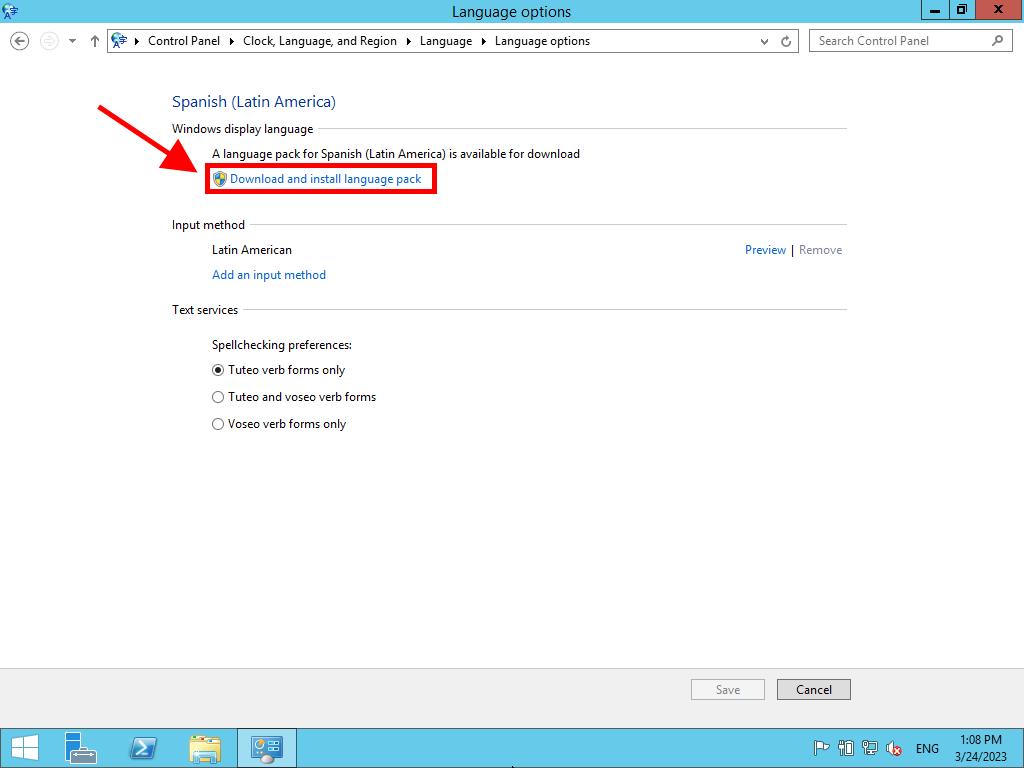
- Once the language is added, click on Options next to the added language.
- Then, click on Download and install language pack.
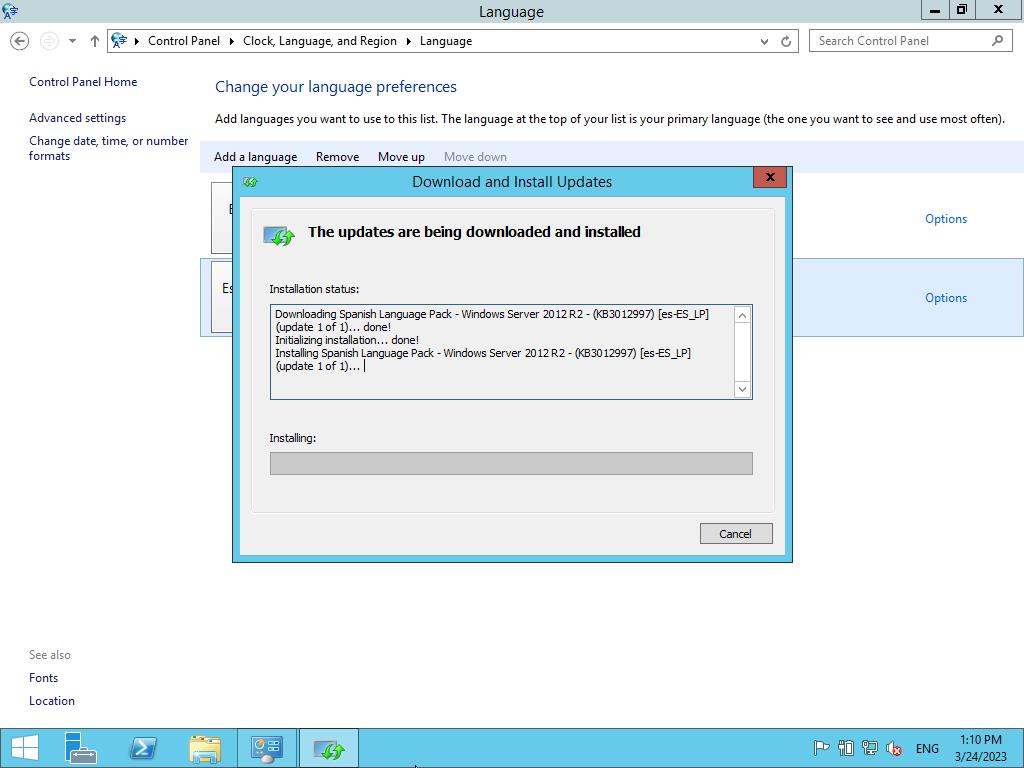
- Wait for the language pack to download and install.
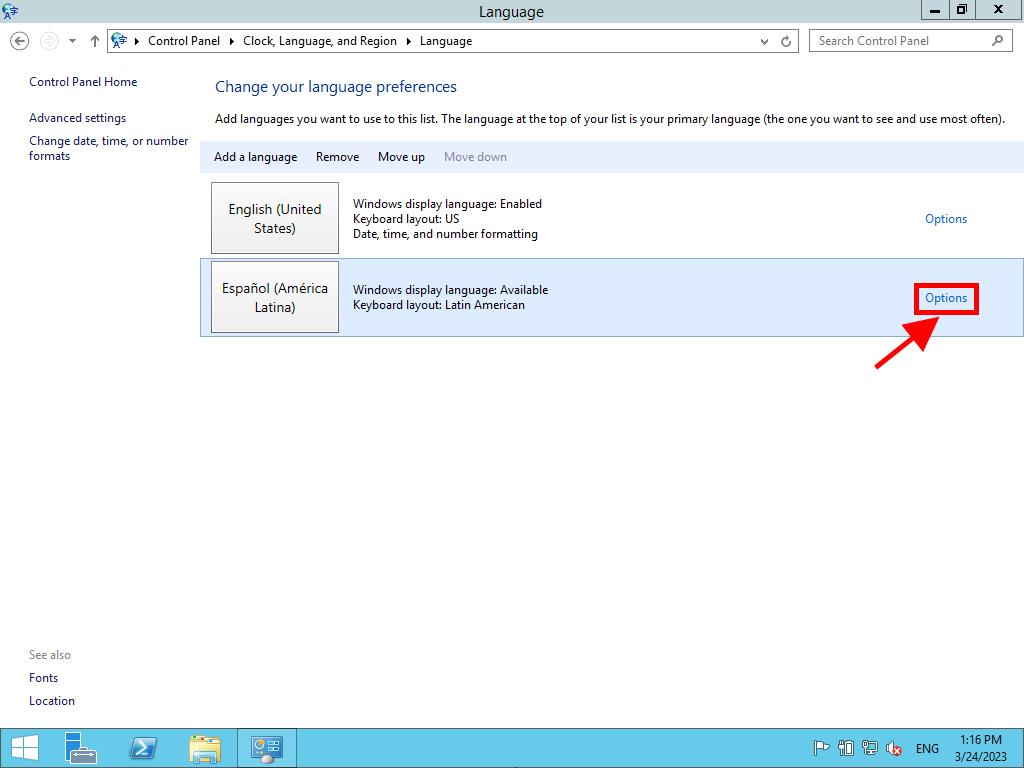
- Once the installation is complete, click on Options again.
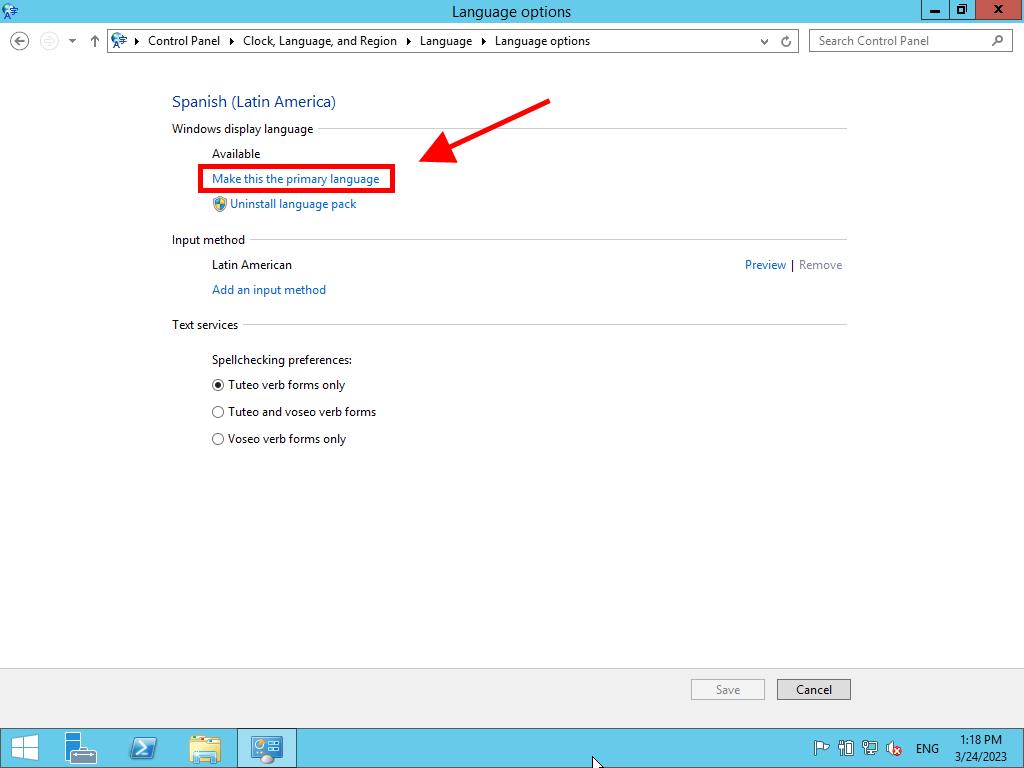
- Then, click on Make this the primary language.
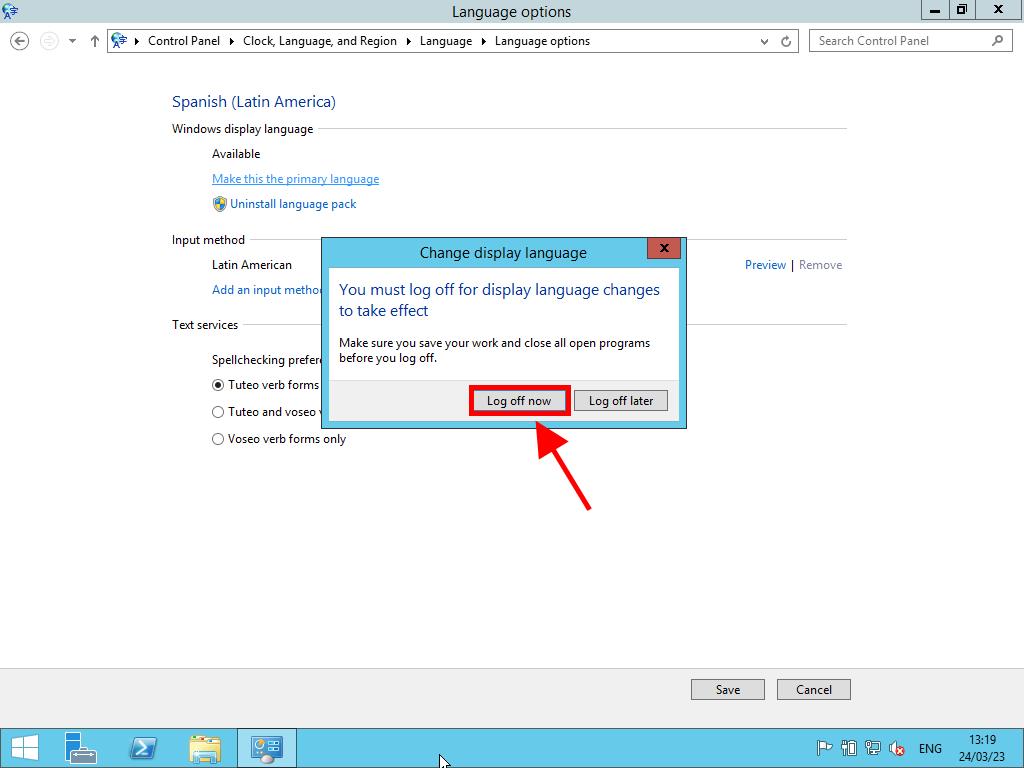
- Finally, click on Sign out now to apply the changes. Your Windows Server 2012 R2 will now use the selected language.

Note: Some languages have regional variants. If so, select the one you need and click Add.