Step-by-Step Guide to Installing Windows 8.1
After preparing a bootable USB drive, follow these instructions to carry out a clean installation:
- Start your PC normally, then insert the Windows 8.1 DVD or USB and restart your PC.
- Your system will boot from the Windows 8.1 USB device. When prompted with Press any key to boot from CD or DVD, press any key.
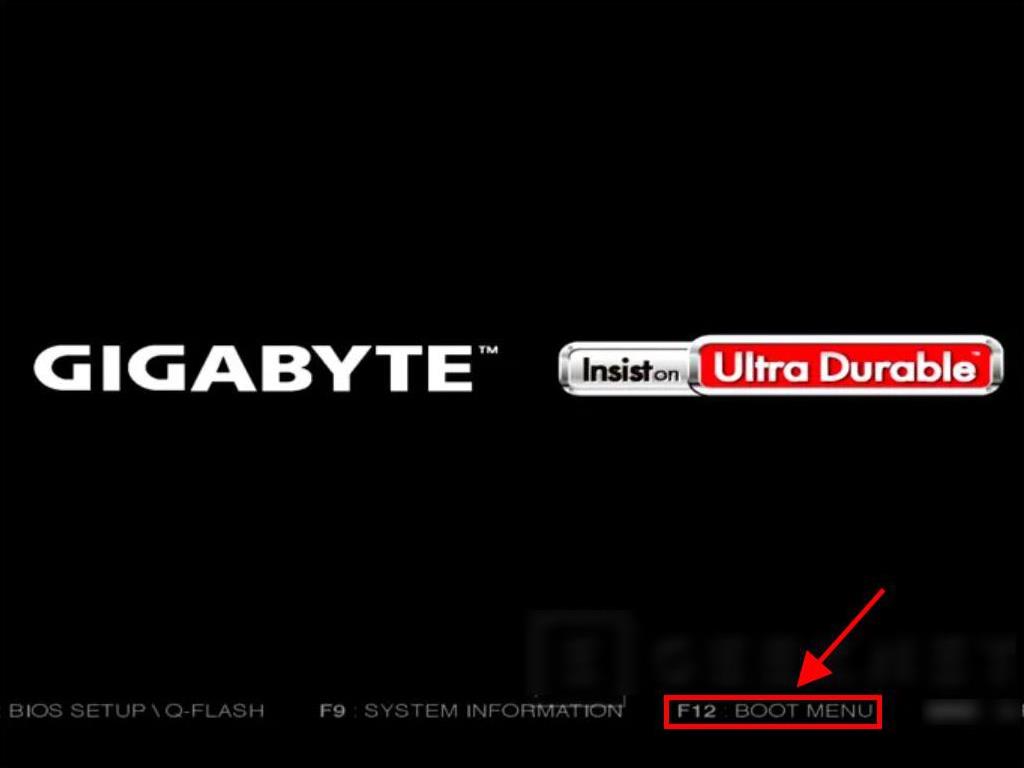
- Restart your PC, and when the manufacturer's logo appears, access the BOOT menu using the designated startup key, usually F2, F10, F11, F12 or Del.
- Change the boot sequence to USB.
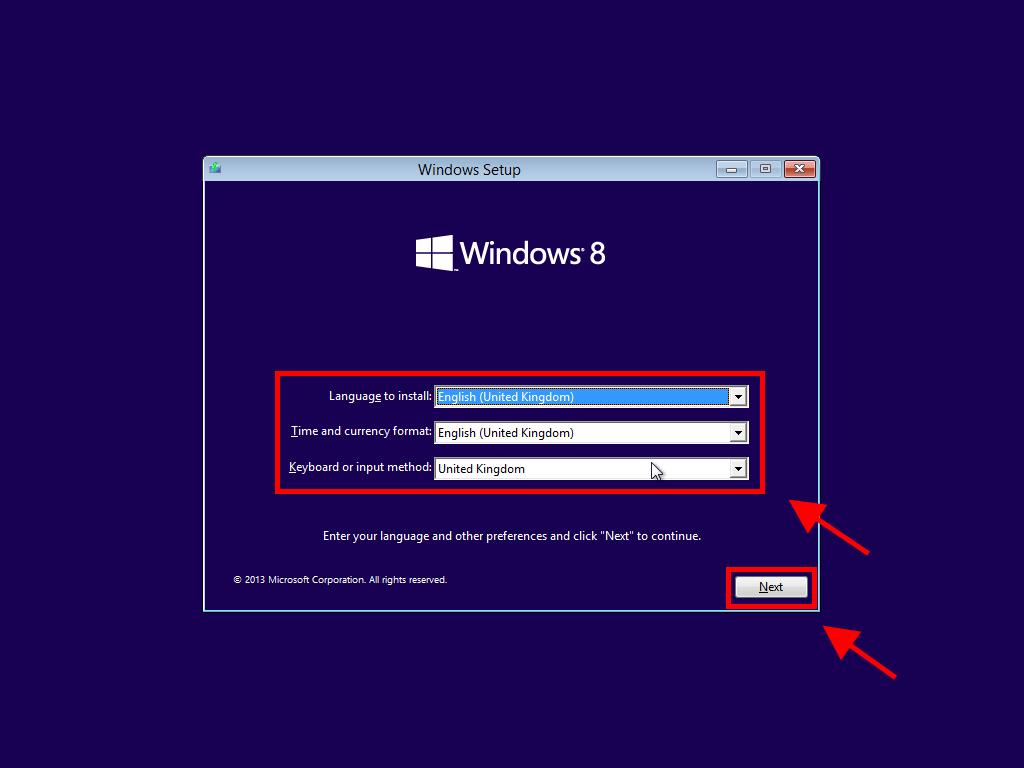
- In the setup program, choose your language, time format, currency, and input method, then click Next.
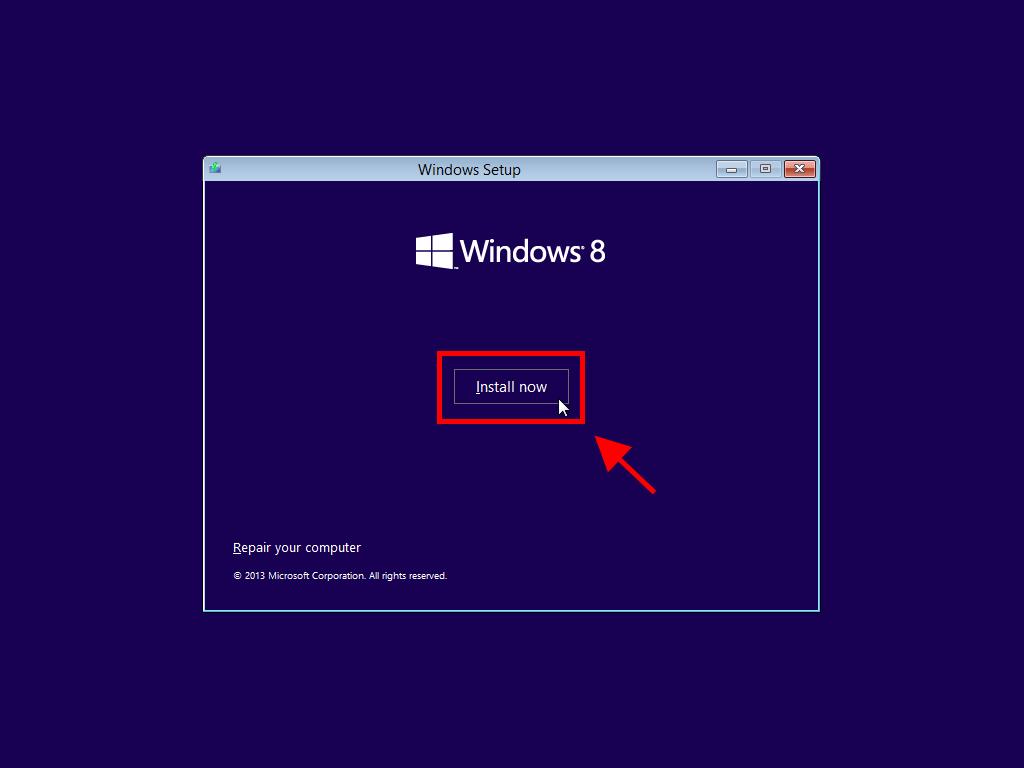
- Click Install now to commence the installation.
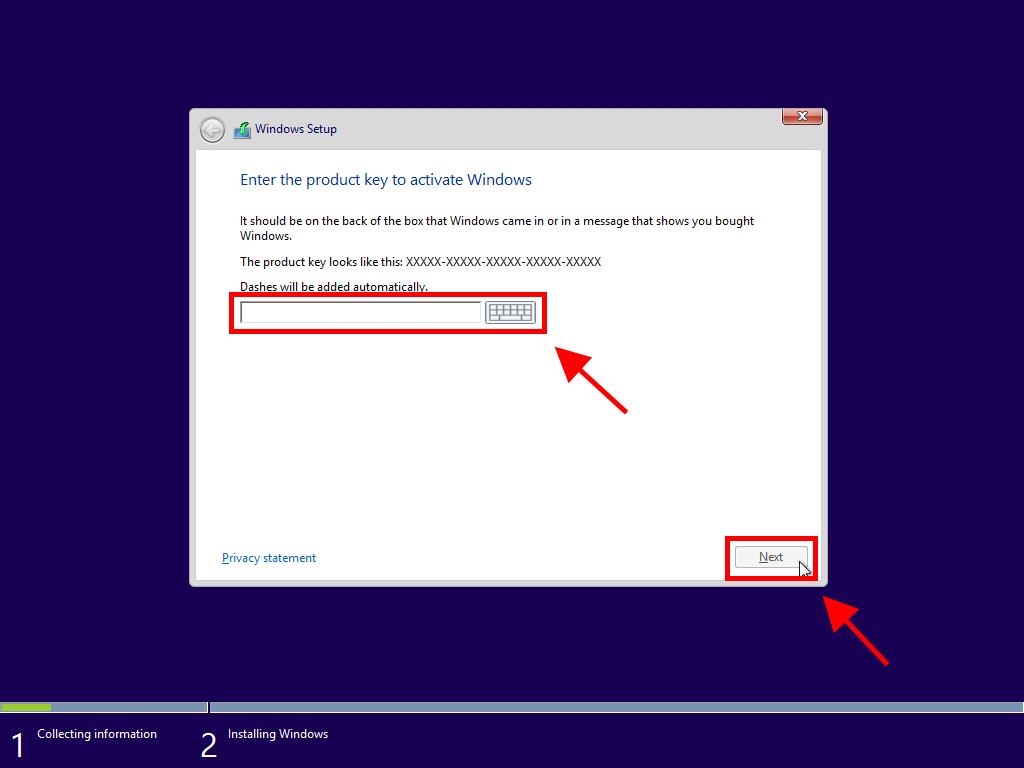
- Enter the product key to activate Windows 8.1, then click Next.
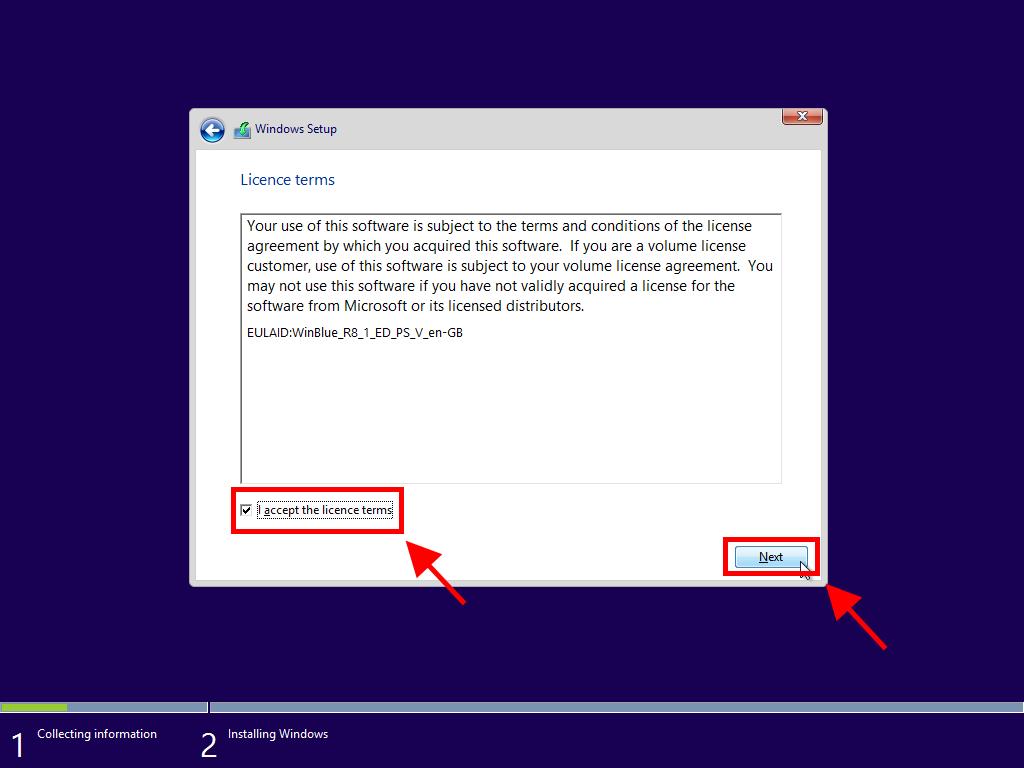
- Accept the licence terms and click Next.
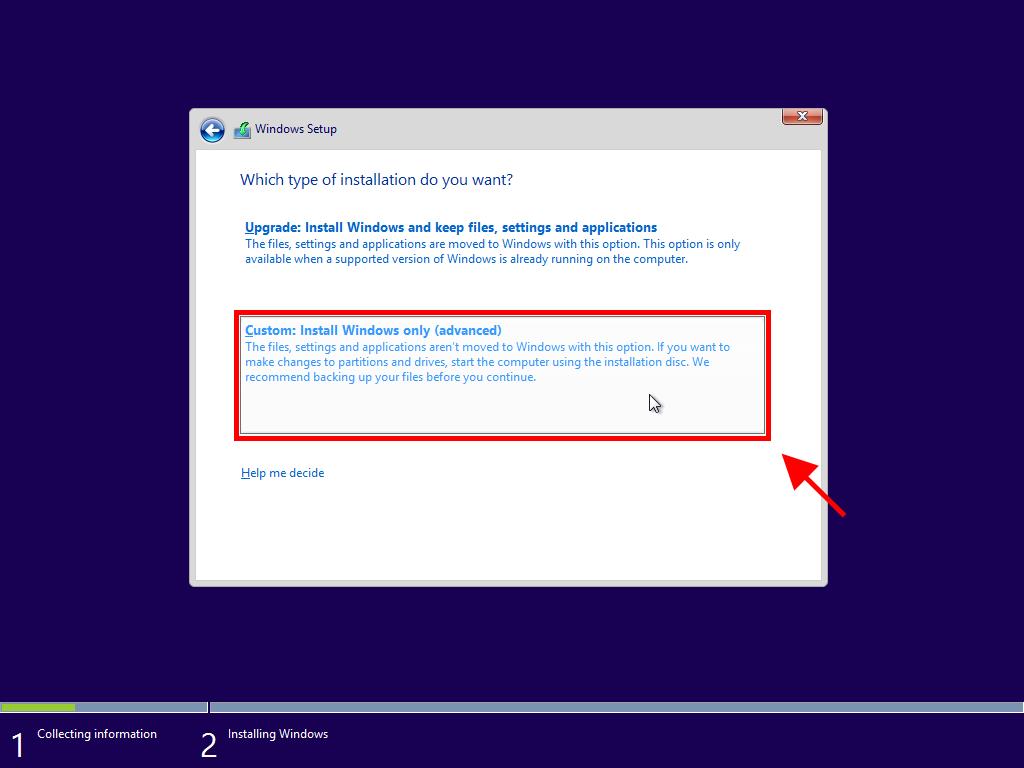
- On the subsequent screen, choose Custom: Install Windows only (advanced).
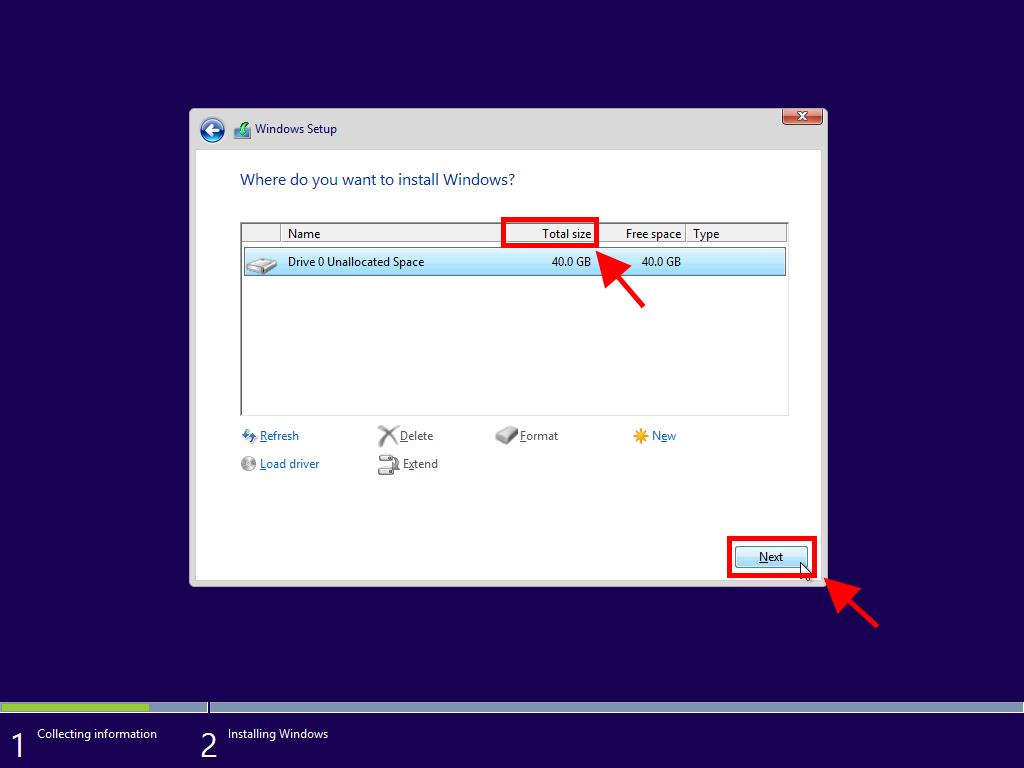
- Select the disk drive where you want to install Windows 8.1.
- Click Next and Windows will begin installation.
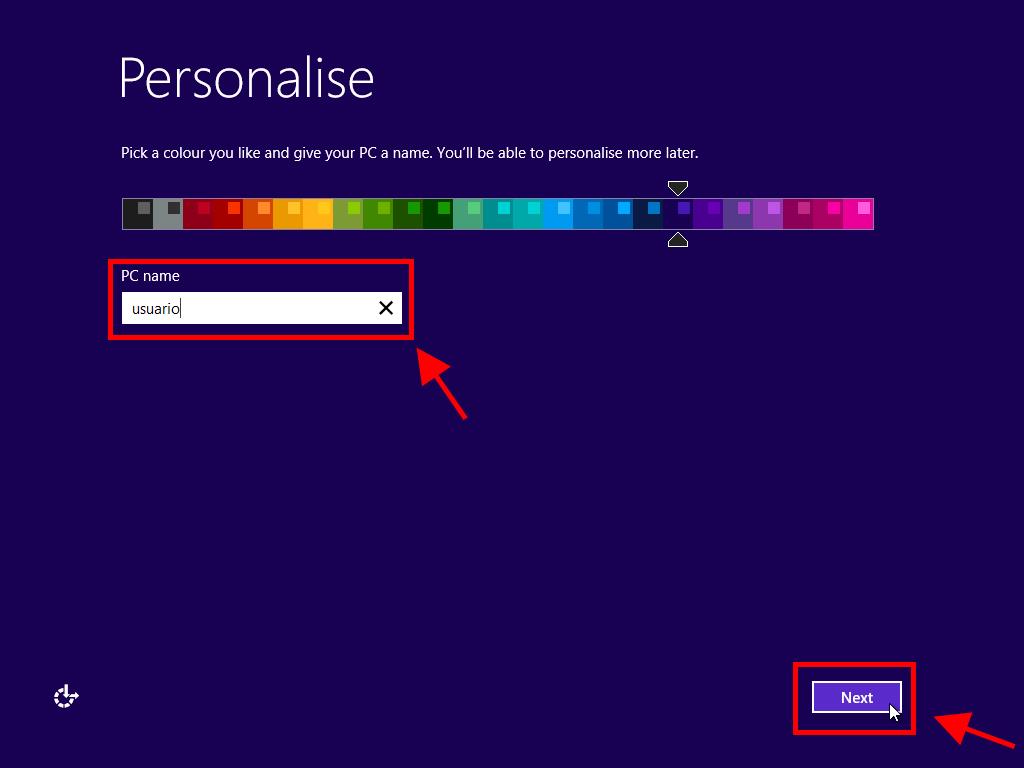
- After several restarts, you'll be prompted to personalise your PC. Choose your preferred colour and name your PC, then click Next.
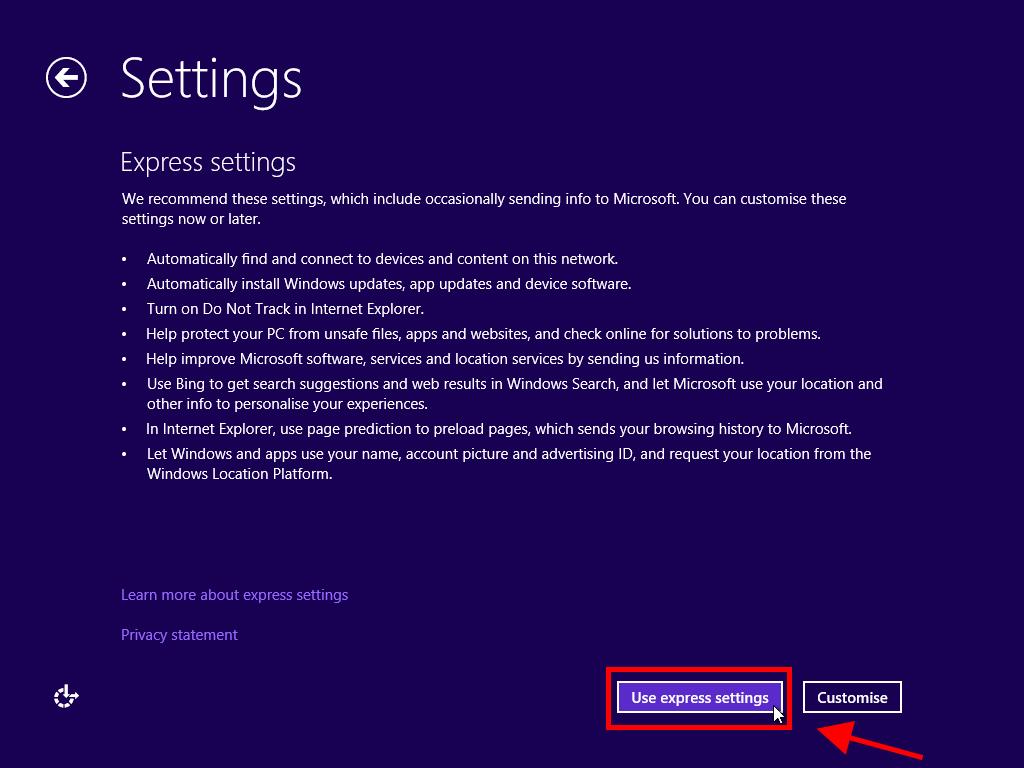
- Select Use express settings.
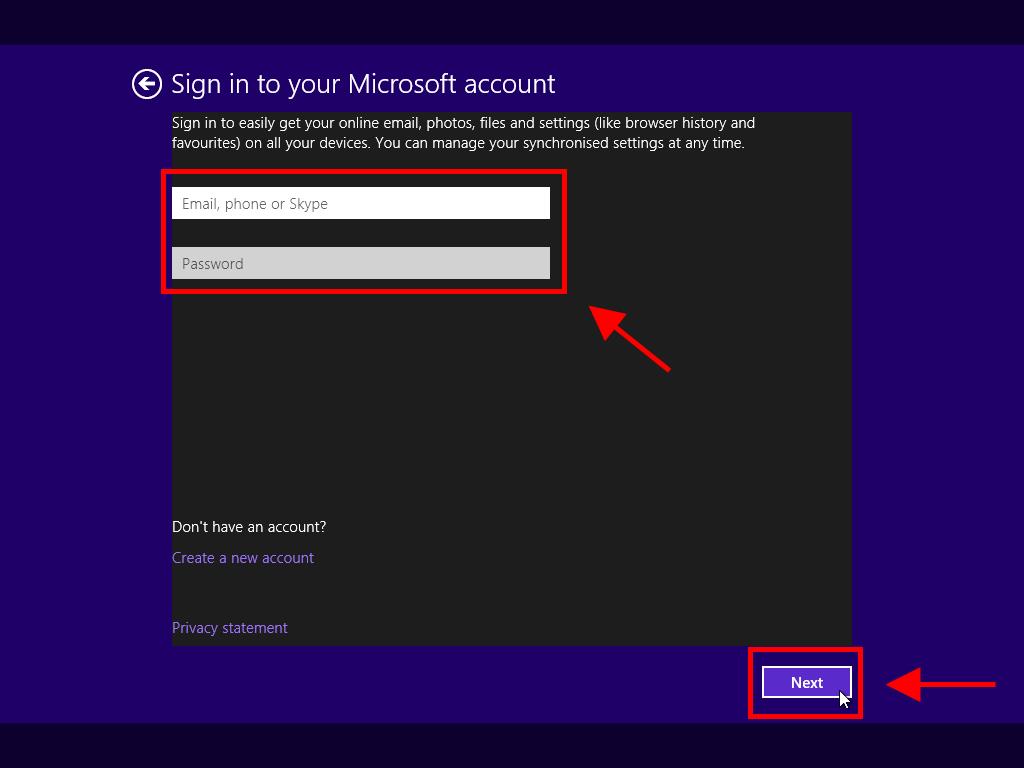
- Sign in to your Microsoft account using your email (Hotmail / Outlook / Live).
- Click Next.
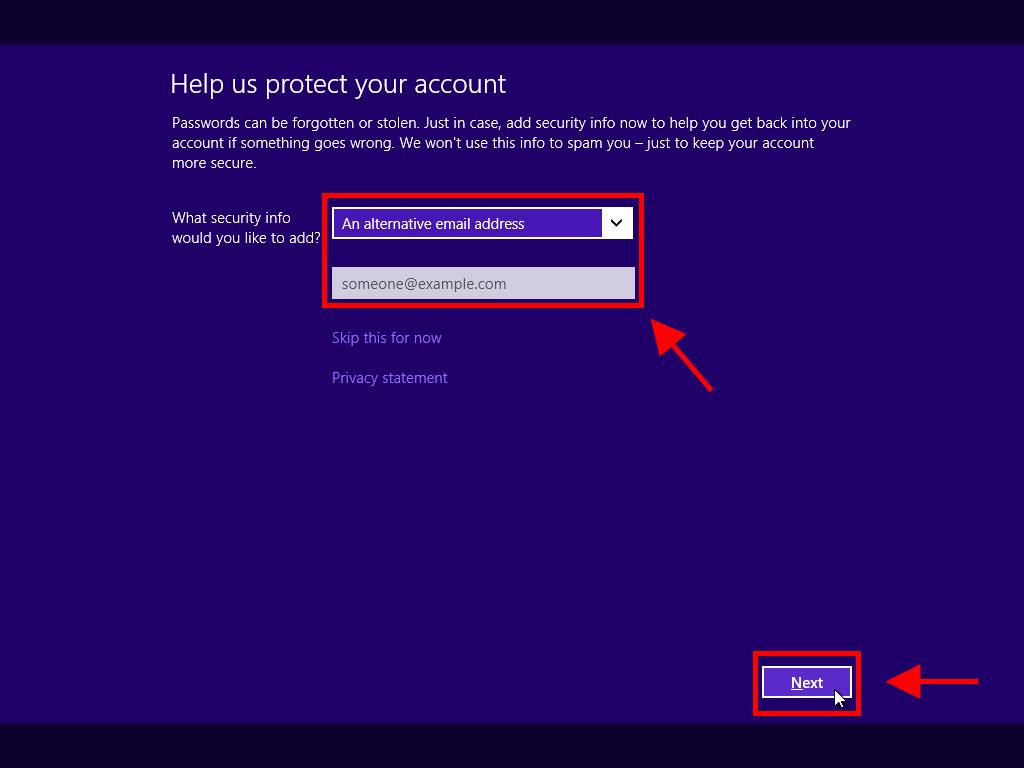
- Provide security information to recover your account if needed, then click Next.
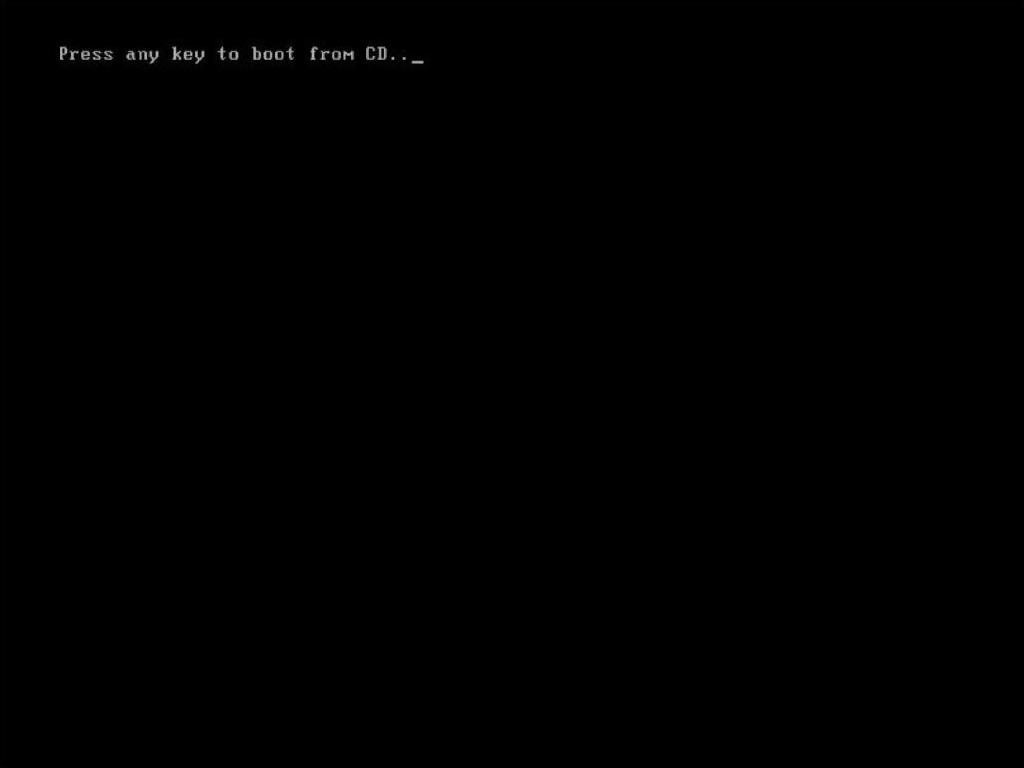
Note: If your current version of Windows starts upon reboot, adjust the boot order in your PC's BIOS settings to boot from the DVD.
Note: To identify the correct hard drive, check the Total size column and select the drive with the most GB available.
Note: If you don't have an email account, click to create a new one.
Note: If preferred, click Skip this for now to bypass this step.
Once this setup is complete, wait a few minutes for Windows 8.1 to finish installing.
 Sign In / Sign Up
 Orders
 Product Keys
 Downloads

 Go to United States of America - English (USD)